Planning a memorable anniversary surprise but feeling stuck on what to do for the cake? A plain, store-bought cake might not capture the emotions you want to convey. That’s where a personalized Happy Anniversary Cake with a photo and name edit comes in. It’s the perfect way to add a personal touch, making your celebration as special as the relationship itself.
A Happy Anniversary Cake with Photo and Name Edit is a custom cake that features a personalized touch—adding a photo of the couple and their names to the design. These cakes are designed to reflect the unique bond and love shared between the couple, creating a more meaningful and personal celebration. Instead of a plain cake, this personalized approach makes the cake a part of the celebration itself.
Personalized cakes, like a Happy Anniversary Cake with Photo and Name Edit, have gained popularity because they offer a way to make anniversaries even more special. When you add a personal photo and name, it turns an ordinary cake into a cherished memory. These cakes not only taste great but also serve as a beautiful reminder of the couple’s journey together. A personalized touch makes every anniversary celebration stand out, leaving a lasting impression for years to come.
What You Need to Create a Happy Anniversary Cake Edit

I am explaining it below:
Tools and Software
To create a stunning Happy Anniversary Cake with Photo and Name Edit, you’ll need the right tools. Here are some options:
- Photo Editing Software
Use professional programs like Photoshop for advanced edits. It offers lots of control over image quality and design elements. - Online Design Tools
For beginners, Canva is a great choice. It’s easy to use and has templates specifically for cakes. - Mobile Apps
Apps like PicsArt or Adobe Spark let you edit photos and add names directly from your phone.
Images and Design Elements
The images and design elements are key to making your anniversary cake stand out. Here’s what you should consider:
- High-Quality Photo
Choose a clear, high-resolution photo of the couple. Blurry or pixelated images will look unprofessional on the cake design. - Background Image or Design
You can use a simple solid color, floral designs, or even a romantic background like a sunset. Ensure it doesn’t distract from the main photo. - Anniversary-Themed Elements
Consider adding small touches like hearts, flowers, or anniversary symbols (like rings) to match the theme and make the cake even more special.
Fonts for Name and Message
Choosing the right font is essential for a readable and beautiful anniversary message. Here are some suggestions:
- Cursive Fonts
Elegant cursive fonts like Great Vibes or Dancing Script add a romantic and classy touch to the names and message. - Bold Serif Fonts
If you want the names or message to stand out, try using bold fonts like Georgia or Playfair Display. - Easy-to-Read Fonts
Ensure the font is easy to read, especially for the names. Avoid overly decorative fonts that might make the text hard to decipher. - Complementary Font Pairings
Use a cursive font for the names and a clean, simple font for the message to create a balanced, harmonious design.
Step-by-Step Guide to Edit a Happy Anniversary Cake with Photo and Name
Here’s a detailed, easy-to-follow step-by-step guide to editing a Happy Anniversary Cake with Photo and Name Edit. Each step is broken down clearly for beginners:
Step 1: Choose the Right Photo
- Pick a meaningful, high-resolution photo that represents the couple or their special moments.
- Example: Use a wedding photo or a picture from their latest anniversary celebration.
- Ensure the photo is clear and vibrant so it looks great on the cake.
Step 2: Select the Cake Template
- Choose a template that matches the style and feel of the celebration (e.g., elegant, fun, modern).
- Tip: Websites like Canva and Adobe Spark offer pre-designed templates that are easy to customize.
- Pick a template that leaves space for the photo and the names without looking overcrowded.
Step 3: Edit the Photo onto the Cake
- Upload the photo to your chosen design software or tool.
- Tip: Crop the photo to fit the shape of the cake template. A popular option is a heart-shaped cutout to highlight the couple’s picture.
- Position the photo in the center or the area of the design where it stands out best.
Step 4: Add the Name and Anniversary Message
- Add the couple’s names and the “Happy Anniversary” message in a clear, easy-to-read font.
- Tip: Keep the text legible by choosing contrasting colors that match the cake’s background (e.g., white text on a darker background).
- Make sure the text doesn’t overpower the photo but complements the overall design.
Step 5: Final Touches and Save the Design
- Adjust elements like brightness, contrast, and saturation to make the design pop.
- Tip: Add small decorative touches like hearts, flowers, or ribbons to enhance the design.
- Once you’re happy with the design, save your work in a high-resolution format for printing. This ensures the cake looks as good in real life as it does on the screen.
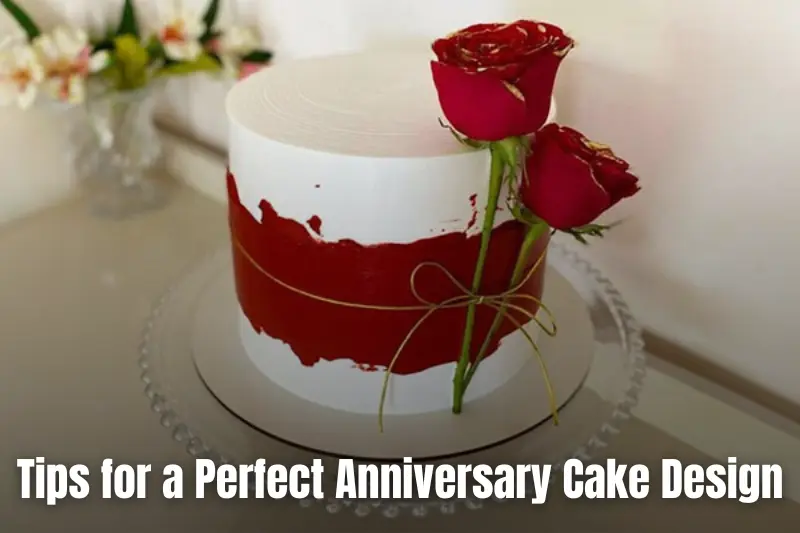
Tips for a Perfect Anniversary Cake Design
Tip 1: Use Soft and Elegant Colors
- Pastel colors like soft pink, lavender, or gold can add a gentle, romantic touch to the cake design.
- Light shades help make the design feel more refined and elegant, perfect for an anniversary celebration.
- Avoid overly bright or bold colors that might distract from the photo and message.
Tip 2: Choose a Theme that Matches the Couple’s Style
- Pick a theme that reflects the couple’s interests, personalities, or the vibe of their relationship.
- Example: If the couple loves vintage styles, opt for a retro design with old-school fonts and sepia tones.
- Consider using elements that symbolize the couple’s journey, such as travel, nature, or even their favorite hobbies.
Tip 3: Ensure the Photo is High-Quality
- The photo you use must be clear and high-resolution. Blurry or pixelated photos can ruin the overall look of the cake.
- Check the quality of the photo before adding it to the design—if it’s too small or blurry, try to use a better version.
- A sharp, high-quality photo makes a huge difference in how professional and polished the cake design will appear.
Tip 4: Balance the Design
- Keep the text and images balanced so the design looks clean and not overcrowded.
- Place the photo and text in a way that each element has enough space to shine. Don’t make the text too large or too small.
- A well-balanced design ensures the cake looks visually appealing and easy to read from every angle.
Real-Life Examples of Personalized Anniversary Cake Designs
Example 1: Classic Photo Cake
- Design: A simple, elegant cake that features the couple’s wedding photo.
- Details: The photo is framed in a beautiful shape, like a heart or oval, and their names are placed neatly underneath.
- Vibe: This design is timeless and works well for couples who enjoy a more traditional look.
- Tip: Keep the background clean and minimal to let the photo and text stand out.
Example 2: Fun and Creative Cake
- Design: This cake features funny photos from the couple’s relationship journey, capturing quirky moments and memories.
- Details: Use playful fonts for the names and anniversary message to match the fun theme.
- Vibe: This design works great for couples with a lighthearted, humorous relationship.
- Tip: Add elements like emojis, doodles, or vibrant colors to keep the tone playful and lively.
Example 3: Themed Cake Design
- Design: A cake that reflects the couple’s personal interests or hobbies, such as a travel theme with photos from their trips.
- Details: Incorporate small details like maps, landmarks, or travel symbols along with their favorite photos from vacations.
- Vibe: Perfect for couples who love to travel or have a specific passion they want to celebrate.
- Tip: Use colors and design elements that match the theme, like earthy tones for nature lovers or bright hues for adventure enthusiasts.
Conclusion
So guys, in this article, we’ve covered Happy Anniversary Cake with Photo and Name Edit in detail. Creating a personalized cake with a photo and names is a wonderful way to make an anniversary celebration extra special.
I personally recommend using tools like Canva or Adobe Spark for beginners, as they offer easy-to-use templates that allow you to create beautiful designs in no time. Don’t wait—try designing your own personalized anniversary cake today and make your celebration unforgettable!
FAQs: Happy Anniversary Cake with Photo and Name Edit
How do I choose the right photo for the anniversary cake?
Pick a high-quality photo that captures a meaningful moment between the couple, like a wedding or recent anniversary. Make sure it’s clear and vibrant, as blurry photos can affect the cake’s design. The photo should also match the cake’s theme for a harmonious look.
Can I create a personalized anniversary cake design without using advanced software?
Yes! There are many beginner-friendly tools like Canva or Adobe Spark that offer simple templates. These platforms allow you to easily upload photos and add text without needing advanced design skills. They also provide helpful guides and features to customize your design.
How do I ensure the text on the cake is easy to read?
Choose fonts that are simple and legible, especially for the couple’s names and anniversary message. Avoid overly decorative fonts that might be hard to read, particularly on smaller designs. Ensure the text color contrasts well with the background for better visibility.
What size should the photo be when editing for the cake?
The photo should be high-resolution and sized appropriately to fit the design template without losing quality. Generally, use a photo that’s at least 1000 pixels in width to ensure it looks crisp and clear. Avoid resizing photos too much, as it can cause them to become pixelated.
Can I add multiple photos to the anniversary cake design?
Yes, you can add multiple photos if you want to highlight various moments. However, be mindful not to overcrowd the design—make sure each photo has enough space to stand out. Use creative shapes or collages to arrange multiple photos neatly.
How do I print the design onto the cake?
Once your design is ready, save it in a high-resolution format like PNG or JPEG. You can either print it on edible paper using an edible ink printer or send the file to a local bakery that offers edible image printing. Ensure your design fits the size of the cake.
What cake template should I choose for a personalized design?
Select a template that fits the style of the anniversary celebration, such as modern, classic, or fun. Many online tools like Canva offer a variety of templates that can easily be customized with your photo and text. Ensure the template has enough space for both the image and the message.
Can I add decorative elements like hearts or flowers to the design?
Yes, adding decorative elements like hearts, flowers, or ribbons can enhance the cake design. Make sure these elements match the couple’s personality and the overall theme of the celebration. Don’t overdo it—simple accents usually work best for a clean, elegant look.